Pastels will be everywhere spring and summer, especially on me! Black accents tone it down for a more casual and contrasting look. Like the bracelets? Check out the DIY here: http://socialcollectivegroup.blogspot.ca/2012/04/diy-wrap-bangle-bracelets.html
2012-04-22
2012-04-11
DIY wrap bangle bracelets
This DIY is very simple and only takes about 5 minutes. If you don't have one of these I'm sure you will want one now.
All you will need is:
- Bracelets (bangles)
- Cord/ string/ yarn/ hemp
- Scissors
Most girls have these bangles piled up in their jewellery boxes somewhere. If you don't then you can find them anywhere in packs of dozens from any accessory store, departure store, dollar store, and/or thrift store. You can use any size, thickness, material, or colour.
I will be putting two small ones together to create a thicker bracelet.
Pick a colour of string. I'm using bamboo cording from Michael's, but you can use anything really. I chose to use the second from the bottom of the pack since it would give me a cool effect. Cut about 6 feet of string (give or take on how thick your bracelet is and how thick your string is). Don't worry if you run out of string you can always add in another piece, but it looks best with one continuous one.
Tie a good knot with your string and start to wrap the bracelet over and over again until you get all the way around. Then make sure you tie off the end with more knots. If you wanted to make sure it was even more secure you can always add a dab of crafting glue. Cut off any excess pieces and you got yourself a super cool wrap bracelet.
AZTEC PRINT CARDIGAN
Aztec print cardigan, white chiffon shirt and denim shorts. The perfect effortless attire for a sunny spring day.
PS this is our new addition Ali <3
2012-04-04
THOSE BLUE JEANS
DIY dip dye for your jeans using bleach
Heres what you need:
- Bleach
- Large bowl/bucket/bathtub
- Water
- Rubber gloves
- Jeans
- Washer
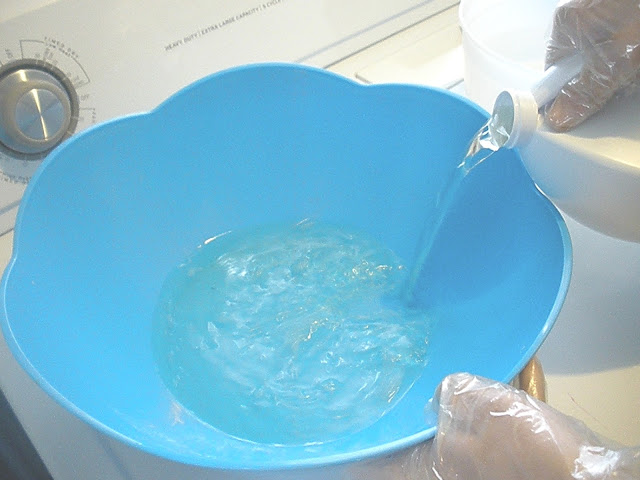
Put your gloves on, rubber gloves are ideal (anything else might disintegrate). Pour 1 part bleach into 2 parts water in a large bowl, bucket, or bathtub. Have another bucket or a sink ready with water to rinse the bleach off before you toss them in the washer. Make sure you place your jeans into whatever you use before you start just to make sure its big enough for them.
Place your jeans into the mix and make sure there is enough liquid to cover them completely. I only wanted the top half of my jeans to be bleached out so I carefully put them in to where I wanted. Keep in mind that liquid seems to seep a little higher than the water line. Its okay if it gets on other unplanned spots, this will only give your jeans more personality!
Depending on how light you want your jeans it can take anywhere from 20-40 minutes. Just make sure to keep an eye on them every 5-10 minutes. I wanted them to be almost white so I left them in for 40 minutes. You will start to see the water turn green when your jeans start to lighten.
Once you're happy with how light they are take them out and put them into another bucket or sink to rinse off some of the bleach. Wring them carefully and toss them by themselves into the washer with detergent to do a full cycle. Dry then wear!
VOILA!
I found this pair of Levis at the thrift store for only $6. High waisted and straight legged. I wore them a few times before I committed into bleaching them out.
I loved how they turned out and will be sporting these through spring into summer for sure.
Now go start your own bleach dip dye DIY!
Subscribe to:
Posts (Atom)


